BLOWING-IN INSULATION
Loose-fill insulation—usually cellulose—can be blown in at low pressure to supplement existing attic insulation or pumped into wall cavities at high pressures to achieve a dense pack that’s virtually airtight. Before insulating, be sure to review earlier sections of this chapter on sealing air leaks, correcting excess moisture, and blocking insulation to keep it away from potential ignition sources such as chimneys and unrated recessed lights. Also keep insulation away from knob-and-tube wiring that’s still energized (see Chapter 11 for more information about this old wiring).
Equipment. You can rent insulation blowers and hoses. And some suppliers will loan the equipment free if you buy the insulation from them. If you’re loose-filling an attic in a two – or three – story house or dense packing insulation in walls,
you’ll need a more powerful machine, usually wired for 240 volts or 120/240 volts. Almost all pumping units require two workers, one to feed insulation into a hopper and the other to operate the hose. Consequently, most machines have a remote on/off switch so the hose operator can stop the blower as cavities fill up. A remote switch also allows you to shut off the blower at the first sign of a clogged hose. Most machines have adjustable gates or air inlets that control the air-insulation mixture. Have the equipment supplier explain safe operating procedures to both workers.
Units typically come with 3-in. corrugated plastic hoses whose sections join with steel couplings. If you’re blowing-in attic insulation at low pressure, 3-in. hoses can blow a lot of insulation quickly. (When filling large, open places such as attic floors, pump a low-air, insulation-rich mix.) When filling wall cavities at low pressure,
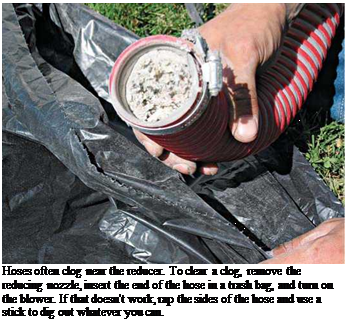 installers typically use a 3-in. by 1-in. reducer to minimize the size of the holes they’ll need to patch later. However, when dense-packing cellulose into wall cavities, some professionals prefer to duct-tape a 5-ft. or 6-ft. length of 1-in. clear vinyl tubing to the end of the 3-in. hose.
Narrower hoses are easy to snake into tight spaces—you can feed them into the far reaches of a cavity—and they deliver insulation at greater velocity. Clear vinyl tubing also allows you to see if the insulation is flowing freely. Because narrower hoses are more likely to clog, run an air – rich, low-insulation mix through them. To clear clogs, blow air alone through the hoses.
In addition to a tight-fitting dust mask and eye protection, you’ll need a drill and drill bit (or hole saw) to drill into exterior sheathing, a flat bar to pry up siding, and a shingle ripper or a mini-hacksaw to cut through nail shanks if you’ve got wood siding. If there’s vinyl or aluminum siding, you’ll also need a zip tool, which has a hook on one end, to lift the tops of the courses you want to remove and get access to the nails holding the siding strip. If the exterior is stucco, you’ll need a tungsten carbide hole saw to drill through it.
|
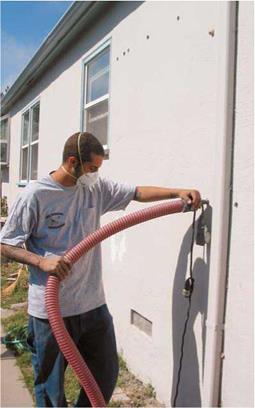
Blown-in installation is typically fed through a 3-in. hose that is reduced into a 1-in. nozzle, which is inserted into holes drilled in the siding. The remote switch draped over the end of the hose enables the operator to shut off the blower quickly, should a clog develop. |
Prep work. When insulating from inside the house, first seal off the heating registers to keep insulation out of the ducts, and rent a commercial shop vacuum with a fine filter for cleanup. Before insulating, clear the room of furniture or cover it with plastic tarps. Important: Before drilling, turn off the elec
trical power to the affected areas, and use a voltage tester (see p. 235) to make sure the power’s off.
Insulating open attics. You’ll want to avoid blocking the airflow from soffit vents; so before blowing insulation, install blocking or air chutes to hold the insulation back. If the attic joists are exposed, run planks across them so you can move safely around the attic. If you staple location flags to the joists, they can double as rough depth gauges as you add insulation. If the attic has floorboards (rather than plywood), pry them up in the center of the attic to expose the joists. Then blow insulation into the joist bays. It’s difficult to blow insulation much farther than 4 ft., so remove boards every 8 ft. or so and feed in about

 |
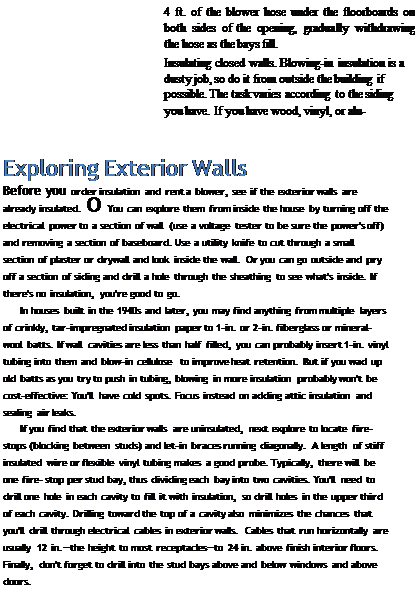
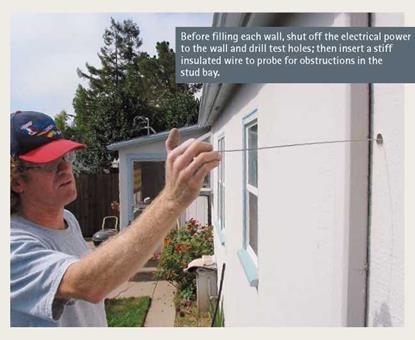 minum siding, remove a course or two when you drill your exploratory holes toward the top of each wall cavity. It’s possible to drill through wood siding and plug it later; but it’s preferable to remove the wood siding, drill through the sheathing, and then replace the siding over the plugged sheathing. If there’s vinyl or aluminum siding, insert a zip tool under the top of the course you want to remove, and slide a flat bar under nails holding the siding strip. Then replace the siding after plugging the insulation holes.
If you have stucco siding, drill directly through it; stucco is tenacious and malleable so plugs will hold well and can be hidden easily by texturing patches to match the surrounding surface.
Ideally, the holes you drill should be slightly larger than the diameter of the insulation injector —the hose reducer or the vinyl tubing used to blow in insulation. If the injector is smaller than the hole, pressurized air escaping will roughly equalize the amount being blown in. If the holes and the injector are exactly sized, little air will escape and the wall cavity will quickly become so pressurized that you can’t blow in insulation. Conversely, if the holes are too large, insulation will be blowing all over the place and you’ll have larger holes to patch. So make the holes roughly ‘/ in. larger than the diameter of the injector.
As you blow cellulose into each drilled hole, cover the hole (and the inserted tube) loosely with a rag or a scrap of fiberglass insulation.
The rag will allow pressurized air to escape but will prevent the cellulose from blowing out.
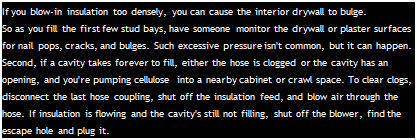
As the insulation starts becoming densely packed, the insulation flowing through it will slow. When a cavity is almost full, it will become so airtight that it will block the flow of additional insulation, causing the blower to whine. (If you stick your index finger into the hole of a filled cavity, it will meet resistance similar to that of poking a middle-aged stomach.) After filling a few cavities, you’ll get a sense of how much insulation you need to fill each one, and the blower’s whine will become familiar. At that point, use the remote on/off to shut off the blower and allow the pressure in the hose to subside. Then pull out the injector and go on to the next cavity.
Note: If you insert clear vinyl tubing all the way into cavities to dense-pack them, gradually pull back the tubing 8 in. to 12 in. as each starts to fill and the insulation flow slows.
Plugging the holes. After each cavity is filled, plug the holes in sheathing with precut beveled wood plugs or corks. (Your insulation supplier should have them in stock.) Smear exterior-grade polyurethane glue around the edges of each plug, and use a hammer and a scrap block to drive the
![]()

 plugs flush to the sheathing. Replace the siding sections, caulk the joints, prime, and paint.
If you drill holes in interior walls to blow in cellulose, plug the holes with manufactured styrene foam plugs that push in till they’re slightly below the wall surface. To reduce dust and ensure clean edges, some installers hand-make a drywall punch by angle-cutting a short length of electrical metal conduit (EMT) at a sharp angle, so that one end looks like the point of an enlarged hypodermic needle. Use a hammer to rap the blunt end of the punch. Finally, cover the plug or the punched hole with self-adhering mesh tape (see Chapter 15), and one or two coats of setting-type joint compound; feather it out to make a smooth join.
USING RIGID-FOAM PANELS IN BASEMENTS
There are almost as many ways to insulate basement walls as there are builders. In this brief section you’ll find two space-conserving assemblies that should prevent mold, while retaining conditioned air.
Suggestions. Here are six suggestions for insulating below grade:
|
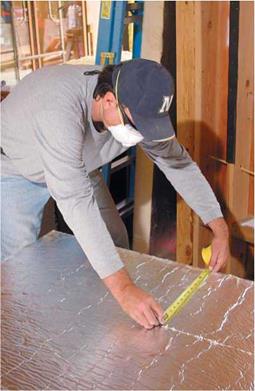
Transfer cut-lines quickly to rigid insulation by using your measuring tape as a marking gauge. Slide your hands in unison-one holding the tape in position along the panel edge, the other holding a utility knife next to the tape’s free end. |
► If a basement is chronically damp because of exterior water, correct that problem before insulating. See "Damp Basement Solutions," on p. 224.
► Plastic vapor barriers aren’t usually needed on foundation walls insulated with foam panels, unless required by local codes— typically, in regions with severe winters. Once you’ve remedied exterior water sources, allow incidental moisture in the foundation walls to migrate outward or inward, so the walls can dry.
►
 |
Seal and insulate the tops of foundation walls because that’s where basements most often leak air and lose heat. Caulk along the mudsill-foundation joint and apply expandable foam along the tops and bottoms


Leave a reply