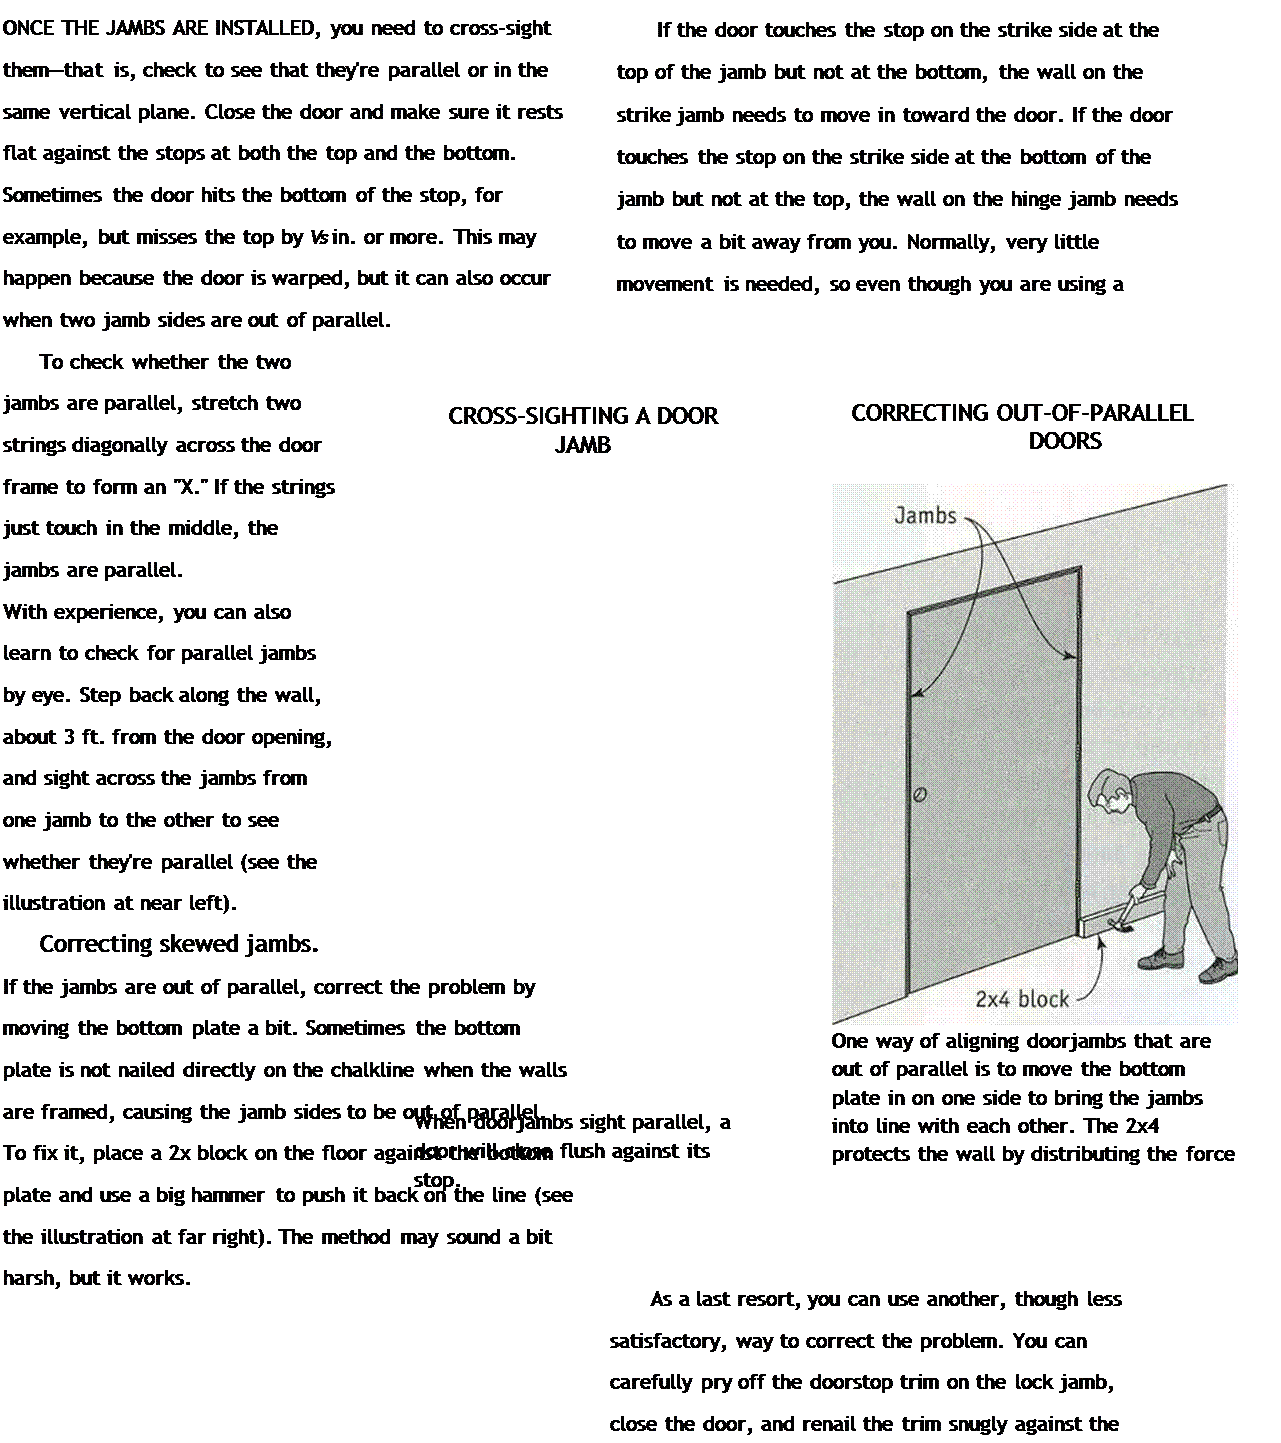
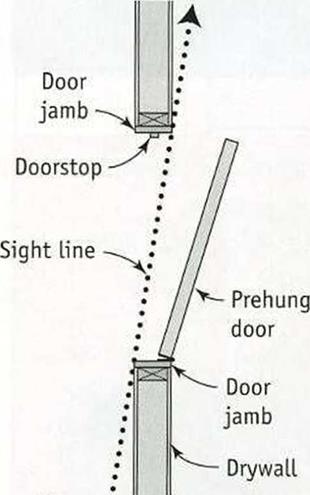
Techniques CROSS-SIGHTING A JAMB


![Techniques CROSS-SIGHTING A JAMB Подпись: LEAVE ENOUGH OPER-ATING CLEARANCE. Leave a Ye-in. margin between the door and the jamb so the door can open and Close freely. [Photo by Andy Engel, courtesy Fine Homebuilding magazine, ® The Taunton Press, Inc.]](/img/1312/image906.gif)
![Techniques CROSS-SIGHTING A JAMB Подпись: KEEP THE JAMBS STRAIGHT. A heavy door can bow a jamb inward at the top hinge. Straighten the jamb by lifting up the door on the lock side and then nailing the jamb securely in place. [Photo by Andy Engel, courtesy Fine Homebuilding magazine, ® The Taunton Press, Inc.]](/img/1312/image907.gif)
|
|
thickness of a nickel, all the way across the top (see the top photo above). If the margin at the top is too tight (less than % in.) or too wide (more than % in.), it can be corrected by raising a jamb side. The hinge side can be raised, even with a nail at the top, with a flat bar
under the jamb. Once the margin is correct, nail again near the bottom hinge. Remember to shim under every jamb that doesn’t rest directly on the subfloor.
When setting heavy doors, the weight on the top hinge can bow the jamb outward. If that happens, place a bar under the door and raise the strike (lock) side of the closed door until the hinge jamb is straight or even bowed back slightly. Then drive a nail through the jamb on the hinge side, both above and below the top hinge.
You don’t need to plumb the strike side of a prehung door. Just bring the jamb near the door so that the margin between the jamb and the door is consistent—and at least % in.—all the way around the door. Once the margin is correct, the strike-side jamb can be shimmed and nailed like the hinge side (see the illustration on the facing page). Keep all nails well above and below the lock area.
When jambs come with the casing trim installed, drive 6d finish nails through the casing and into the trimmer all the way around the door. Try not to drive nails into any grooves in the casing. This makes it hard to fill and sand nail holes.
Any space between the jamb and the trimmer can be filled with a shim before vou nail
/
the jamb to the rough framing. I am not a fan of tapered shims because, unless you use a pair of them, a jamb may not be installed flat and straight. 1 prefer using small pieces of plywood (% in., Уїв in, Z in., or thicker) for shims.
I slide a З-in.-square shim between the jamb and the trimmer to provide solid backing before nailing the jamb sides in place. If there is a wide gap between the jamb and the trimmer, don’t fill the space with a stack of tapered shims. Instead, use a single thick shim.
To strengthen the door assembly, remove a short screw from each hinge and drive an identical-looking but longer screw through


Leave a reply