STEP2 Install the Gable Truss
The first truss to be installed is the gable truss (also called an end truss or a rake truss) that rests on the top plate of an end wall. This truss is usually built differently from regular trusses. Instead of having angled web pieces, these end trusses often have vertical webbing spaced 16 in. or 24 in. o. c. to allow for easy installation of sheathing or siding.
Some carpenters like to sheathe end trusses with OSB and even finish siding before raising them upright (see the photo below). Another option is to cut all the sheathing pieces on the ground, raise the truss, and then nail the precut sheathing in place. It is certainly easier to sheathe a truss on the ground, but it makes the truss substantially heavier and more clifti-
4
cult to handle. If you do decide to sheathe the trusses before raising them, let the sheathing lap down below the ceiling joist chord by a couple of inches. T he lap will be nailed to the top plates once the gable is raised upright. This helps ensure a strong union between the truss and the wall, which is especially important in windv areas.
4
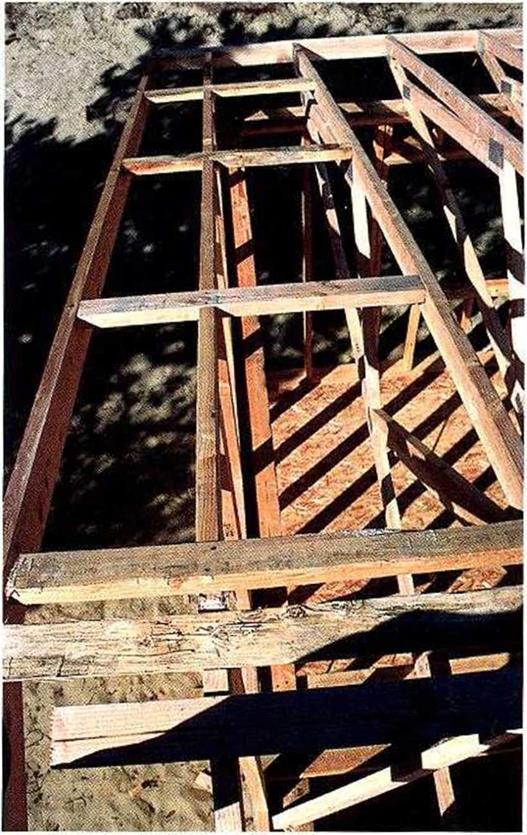
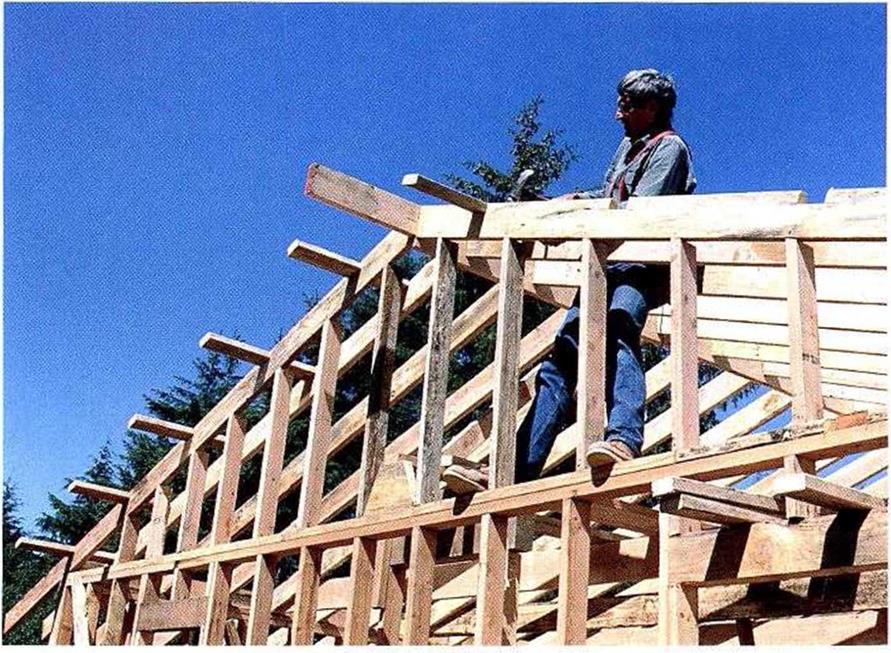
Notches for lookouts arc exceptions to the 11 never cut a truss" rule. Lookouts hold the barge rafters, which extend beyond the build-
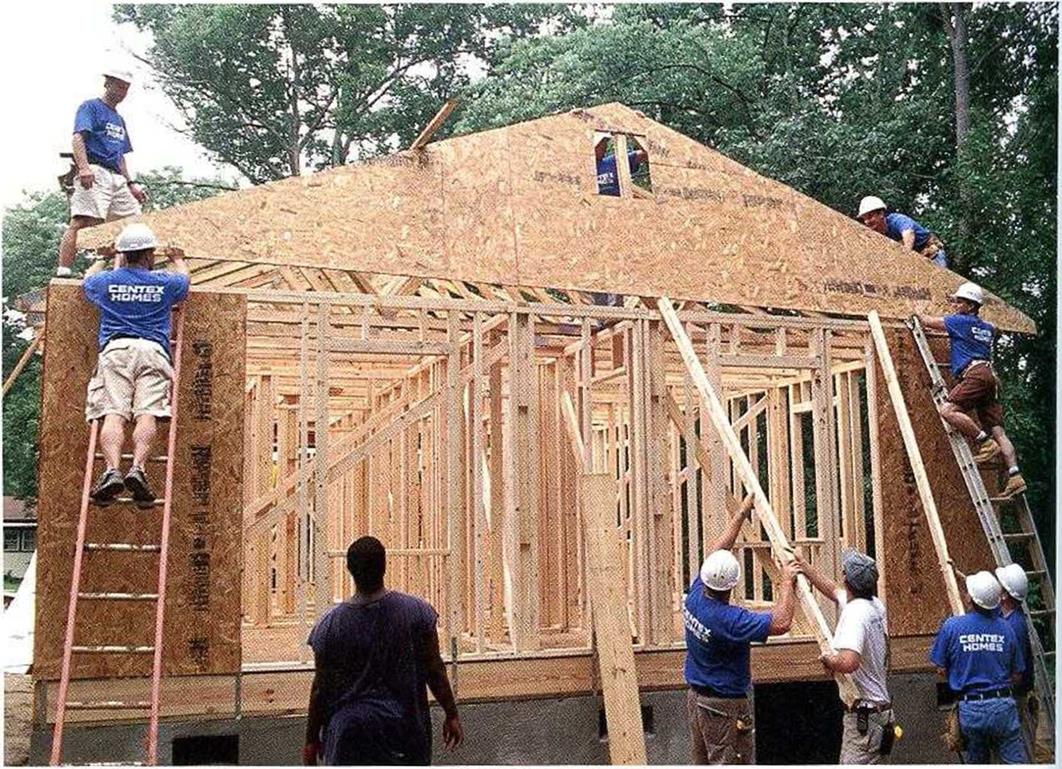 INSTALLING THE LAST GABLE-END TRUSS. Unlike the other roof trusses, this one was sheathed on the ground and then hoisted into position.
ingline at each gable end to create a roof overhang (see the photos at right). Gable trusses can be notched because they are nailed directly over a load-bearing wall. As a result, the entire joist chord of each a gable-end truss is fully supported.
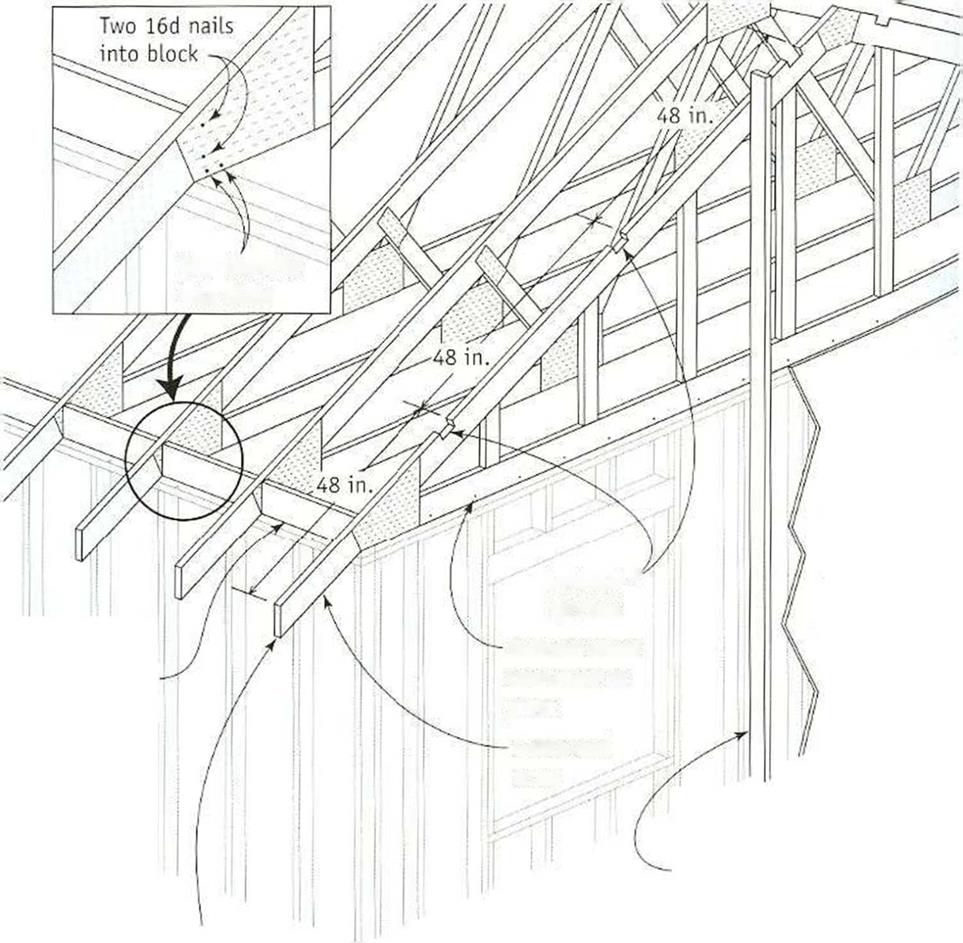
Its best to cut notches for 2×4 lookouts while the gable truss is still lying Hat. For the first lookout, measure and mark 48 in. from the end of the truss tail. Cut a 2×4 notch (which is actually I in. deep and 32 in. wide) below the first 48 in. mark and every 48 in. thereafter (see the illustration on p. 122). With the gutter hoard or fascia in place, 4-ft.-wide sheathing will fall on the lookouts.
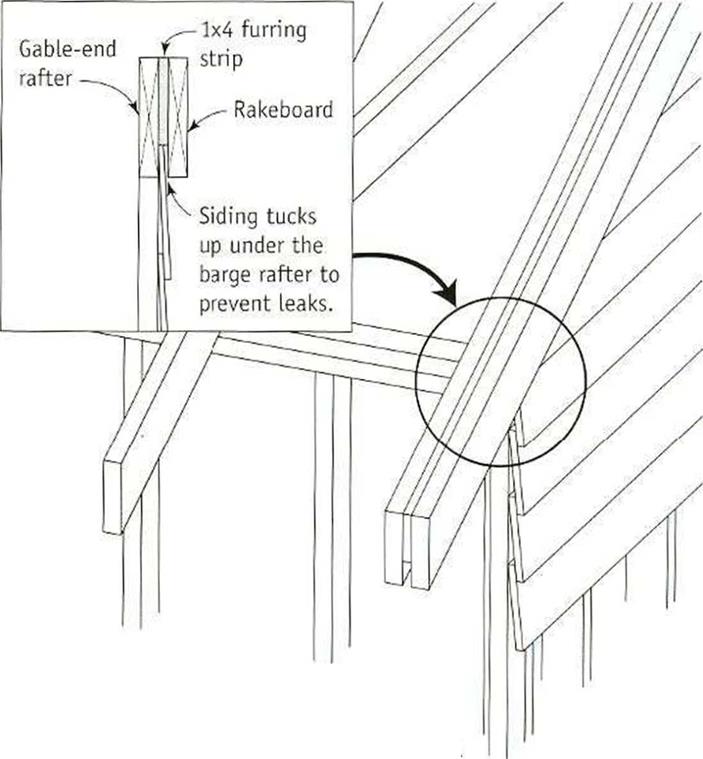
CHOOSING NOT TO NOTCH. Some houses (especially in northern areas) are designed without gable-end overhangs so that more sunlight can get into the house. If this is how you plan to build a house, lookouts or notches are not necessary. Instead, fur out the rake
4
board with lx lumber, so that t ic exterior siding tucks under it (see the illustration on p. 123).
Unless the trusses were set on the walls at the time of delivery, they must be hoisted onto the walls by hand (see the photo on p. 122). Oneway to do this is to set good, strong ladders at both corners of the building. If you’re dealing with long trusses, place a 2x in the center, from the ground to the top plate, at the same angle as the ladders. This way, two people can lift a truss, lay it against the ladders and the center 2x, and walk it up to the top. Another person in the middle with a notched pole can push on the truss as needed.

 In preparation for installing the first truss the gable-end truss), I nail a long, straight.
|
|
 Be aware of wind. Take care with trusses while the wind is blowing. Sheathed trusses can catch the wind like a boat’s sail. Even bare trusses can be difficult to control. If it’s windy, have extra helpers on hand and use extra bracing to keep installed trusses in place.
|
|
|
|
|
|
|
|
|
|
|
|

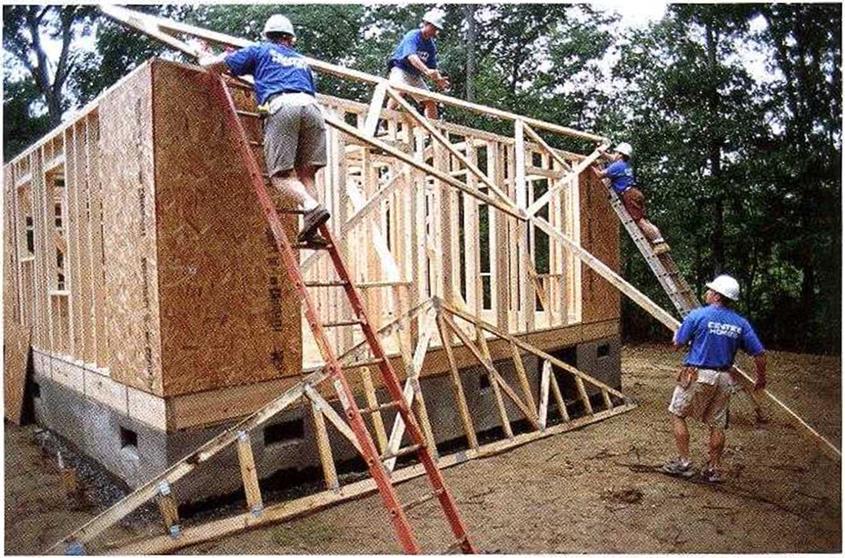 TRUSSES TAKE TEAMWORK. A crew of four does a good job of getting roof trusses up on the walls. Using a long push stick, the ground worker helps elevate the truss.
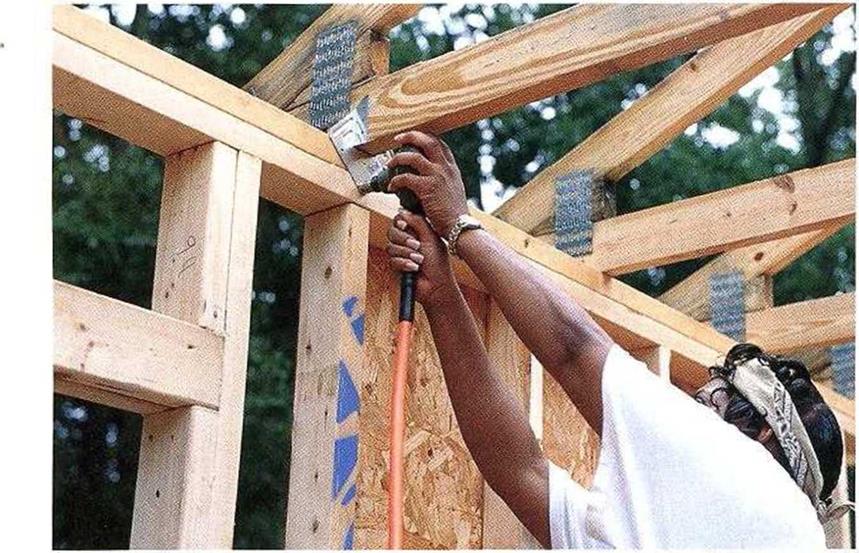
temporary 2x brace on edge to the wall frame near the center of the end wall. This holds the gable-end truss stable until other braces are installed. If the truss is not too large, one person on top can drag the truss to the opposite end and lift it up against the temporary brace. Make sure that the cave overhangs are correct and that the outside of the bottom chord is flush with the outside of the end wall’s top plate. Toenail the bottom chord to the double top plate, driving 16d nails every 16 in.
Trusses by themselves arc rather fragile. They gain strength when they’re properly blocked and braced. I will now explain various blocking and bracing strategies, because this work needs to be done as the trusses are installed.
Safely on the Job WORK SAFELY ON A ROOF
KEEP YOUR WITS about you and pay extra attention to what you’re doing when you’re up on a roof— both to keep yourself safe and to ensure that the integrity of the roof is not compromised.
ж To get on and off the roof, use a good, sturdy ladder that extends 3 ft. above the edge of the roof.
ж Keep the roof dean so that there won’t be anything to trip over.
ж Be careful when sawdust is on the roof. Sawdust on a sloped roof can be as slick as ice. To be safe, call out measurements to cutters on the ground and have them dear the board of sawdust before handing it up to you.
Never throw anything off a roof, not even a shingle, without first checking to see that no one is down below.
In the hot sun, asphalt shingles soften and tear. Walk gently so you don’t damage the shingles. In hot weather, install shingles early in the morning or late in the afternoon.
In bitter cold weather, shingles become brittle and crack. Work carefully, and pray for sunshine.
Shinglers who nail off a roof by hand often sit on the roof as they work. In hot weather, try sitting on a piece of foam while nailing shingles. Otherwise, hot shingles can literally burn your backside.
|
|
|
|


Leave a reply