Sealing, Insulating, and Ventilating a House
THE OLD HOUSE I WAS BORN IN STILL STANDS out there on the prairie. When I was a child, the house was simply unbeatable in the wintertime. We definitely spent more dollars trying to heat the house than we did on the mortgage. Nowadays, the house has new doors and windows, insulation in the ceiling, and a real heating system— not just an old iron stove in the kitchen. But there are still plenty of cracks and gaps in the walls for those ever-present western winds to howl through.
Thankfully, we don’t build houses like we used to. Today, there are materials and methods available that allow us to design and build energy-efficient houses that hold heat during the winter and keep it out during the summer. But attaining high levels of comfort and energy efficiency is not always a simple feat. In fact, it can be the most technically complex aspect of building a house.
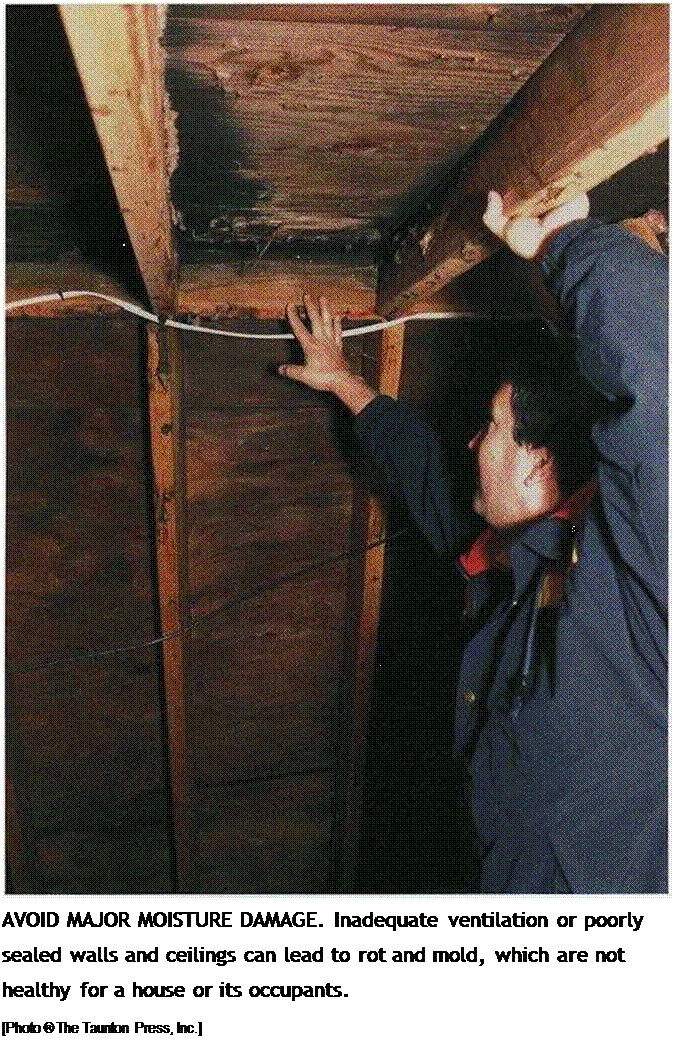
The products that we use to seal, insulate, and ventilate houses may do more harm than good if they’re not installed correctly. Common problems include poor indoor-air quality, peeling paint on interior and exterior surfaces, moldy bathrooms, and rotten wood in walls and ceilings (see the photo on p. 194). Sometimes we solve one problem (such as cold air infiltration during winter months) and cause another
1 ![]() Seal Penetrations in the Walls, Ceilings, and Floors
Seal Penetrations in the Walls, Ceilings, and Floors
2 Insulate the Walls, Ceilings, and Floors
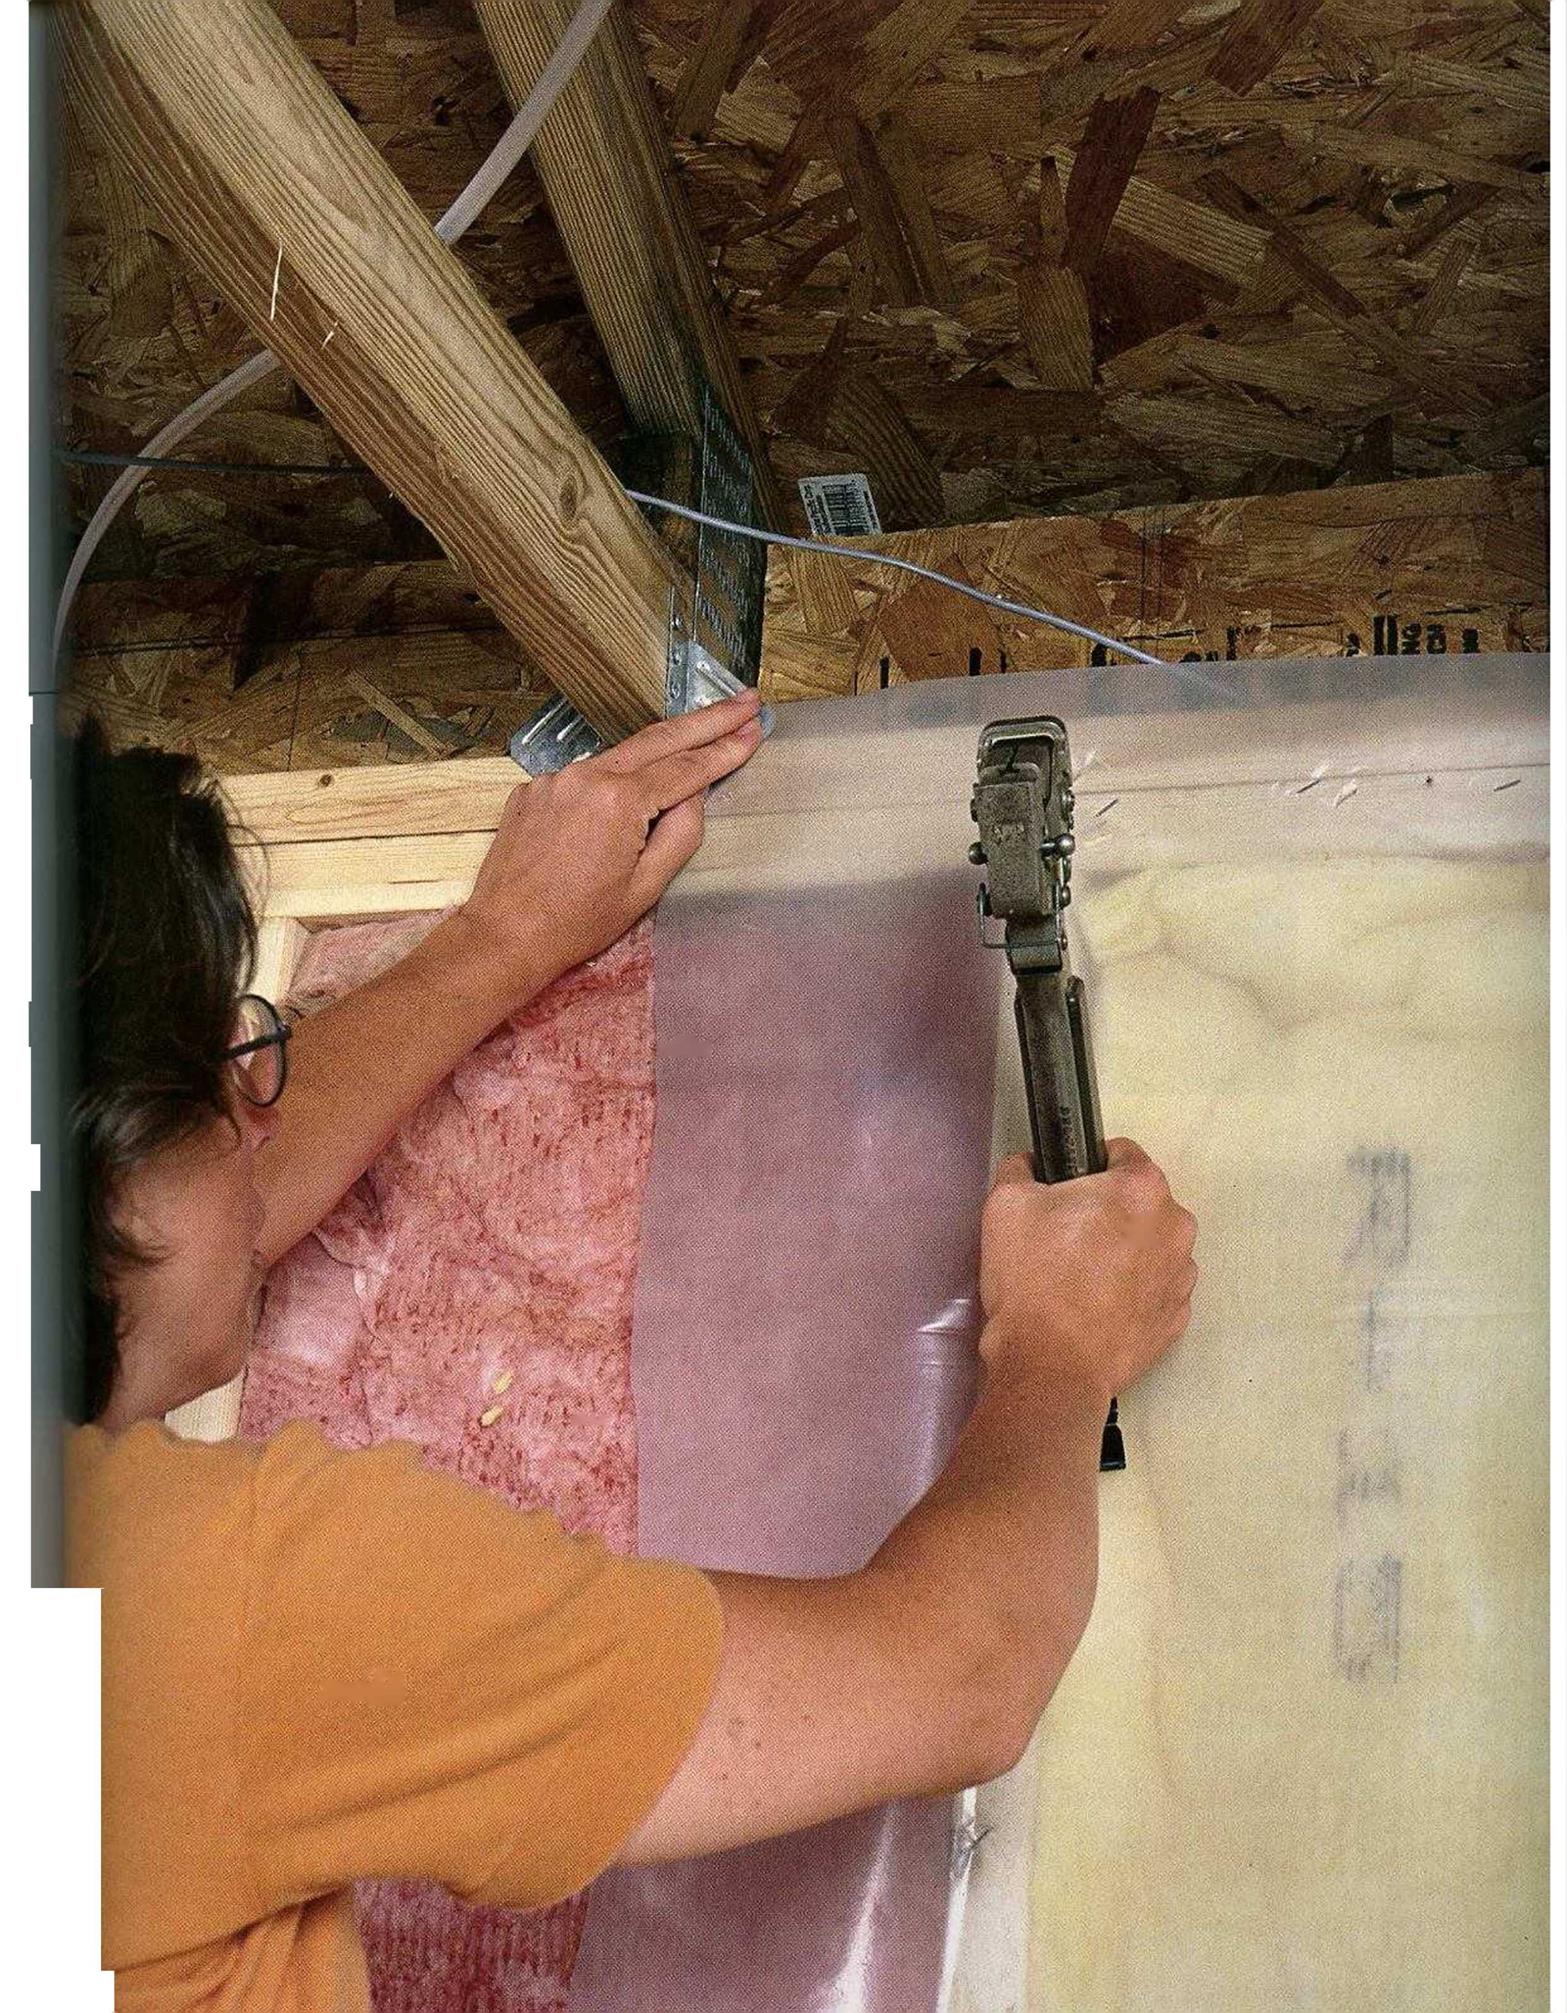
3 Install Vapor Barriers (if Necessary)
4 Provide Adequate Ventilation
1Q? I
|
|
|
|
|
|
|
|
|


![]()

(high concentrations of stale, humid indoor air, for example). And thanks to the significant climate differences in this vast country of ours, what works in Maine may be ineffective in Texas.
Although there is no standard approach to building a tight, comfortable, and energy – efficient house with good indoor-air quality, its not difficult to achieve those goals if you understand how a house works in terms of insulation, airtightness, and ventilation. This is especially true with the basic, affordable
houses that Habitat builds. This chapter explains the concepts, materials, and techniques to make your house comfortable, healthy, and energy efficient no matter what the temperature is outside. To expand your knowledge, see Resources on p. 278.
Before we dig into the technical details, here’s a final thought to keep in mind as you tackle the sealing, insulation, and ventilation work in your building project: Try to keep everyone aware of these important issues. When houses were built with simple materials, they were both leaky and energy /«efficient. People working in the trades didn’t really need to understand the work of those preceding or following them. To build a safe, energy – efficient, nontoxic house, everyone involved in its construction must have more knowledge and work together. Otherwise, a house that was perfectly sealed and insulated can be left riddled with holes by a plumber, electrician, or heating contractor who was “just doing his job.”
Sweaters, Windbreakers, and Rain Gear
Don’t worry; we haven’t suspended our home – building work to look through the L. L. Bean catalog. But what you already know about sweaters, windbreakers, and raincoats will help you understand the way sealing, insulating, and moisture-protection treatments work together in a house.
Start with a sweater and a windbreaker— just what you need to wear on a cold, windy day. A house exposed to frigid temperatures and icy winds also needs a sweater and a windbreaker. Insulation, exterior siding, and housewrap provide this protection. In fact, housewraps like Tyvek and Typar® act like a Gore-tex® raincoat, blocking wind and water while still allowing vapor to pass through.
Materials CODE REQUIREMENTS FOR INSULATION
MOST LOCALES have an energy code that defines how well insulated your house must be. Check with the building inspector in your community for this information. Rather than requiring so many inches of fiberglass or rigid foam, these codes define insulation requirements in terms of R-value, or resistance to heat flow. The higher the R-value, the greater the insulating value. For example, code may require that exterior walls be R-ll or R-19. As it turns out, a 2×4 wall with fiberglass insulation designed for a 3V?-in. wall has an R-value of 11. A 2×6 wall with 5Уг-іп.-thick fiberglass has an R-value of 19. Don’t try to stuff R-19 fiberglass batts into a 2×4 wall, though. Carpenters say that’s like trying to stuff a 1000-lb. gorilla into a 500-lb. bag. It just doesn’t work.
Remember—code requirements set minimum standards. As far as building materials go, insulation is relatively inexpensive, so it’s often cost effective to install more insulation than what is required by code. A house with lots of insulation (in the attic, for example) will not only reduce your heating bill for years to come but may also save you money up front by reducing the size of the heating or cooling system you need to install!
This helps prevent moisture buildup, both in our clothing and inside the walls of a house.
As we work through the steps ahead, you’ll see that there are different sealing, insulating, and ventilation tasks that need to be done at different stages of the construction process.
Pay attention to the tasks associated with each phase of construction and your house will repay you with maximum levels of comfort, longevity, and energy efficiency.


Leave a reply