Working safely on a ladder
Over the years I’ve learned the hard way to be extremely wary of ladders. While they are often indispensable, they need to be treated with the same respect accorded a powersaw. A fall from a ladder can seriously injure or kill you, and every carpenter (and many homeowners) can tell of injuries related to a ladder mishap. Here are a few safety tips to make working on a ladder safer.
• Buy a quality ladder. Check the ladder’s label for a rating of 1 A, which means that the ladder is a heavy – duty one.
• If working near or with electrical wiring, it’s a good idea to own a nonconductive ladder. Fiberglass is a good choice, although these are typically heavy and expensive. (Aluminum and wet wood ladders can conduct electricity.)
• Don’t stand on the uppermost steps of a ladder; get a longer ladder instead.
• Don’t reach too far to the side of a ladder. You can lose your balance.
• Don’t leave tools sitting on top of an unattended ladder.
• When using a stepladder, unfold it all the way, lock its braces, and set it on a solid surface.
• When using an extension ladder, make sure its feet are firmly and securely planted on a solid surface.
|
|
important to do them correctly. This is one of those times when utmost accuracy is important. Straight, plumb walls leave behind a lasting story of your skills. No professional carpenter wants to leave a job with crooked walls that lean to one side. If you make sure walls are plumb and lined, all the following work by every trade will go easier, and the finished house will look better.
Plumbing is done first. You’ll need a plumbstick with a level (see p. 35) and a push stick. If you don’t use a plumbstick,
make doubly sure you use an accurate level. A push stick is used to push walls end for end during plumbing. To make a push stick for an 8-ft. wall, cut a 1×4 or a 1×6 about 116 in. long. Try to use stock without a lot of knots; otherwise, it may break.
You’ll need a partner to plumb the walls. Start with the exterior walls. One person holds the plumbstick in a corner. Adjust this wall by pushing it in or out until the bubble is centered in the level’s vial. A short wall can often be moved by giving
 |
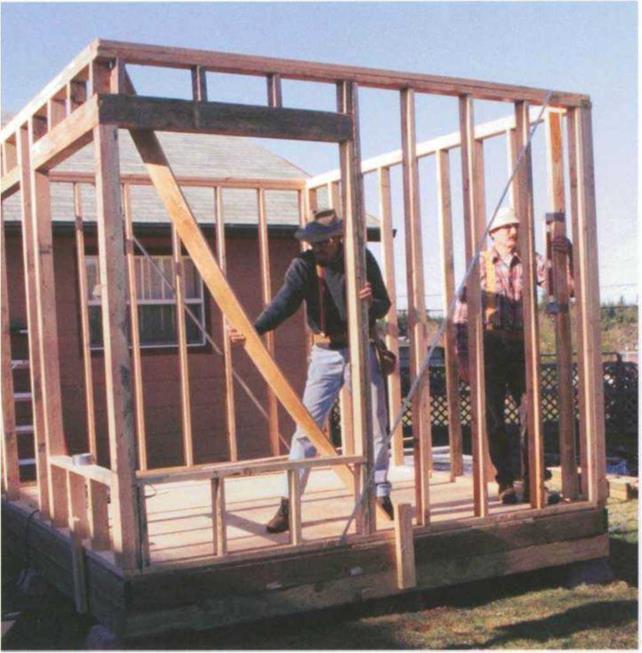
it a shove with your body, but if you need more force, place the push stick under the top plate against a stud and running diagonally down to the floor (see the photo on the facing page). Keep the stick as close to parallel with the wall as possible. Bend the stick down, holding the bottom end against the floor with one foot. Now pull the middle of the stick up. As the board straightens, the wall will move. When the bubble in the level centers, the wall is plumb.
Once the wall is plumb, finish nailing in the metal framing braces. If you aren’t using metal wall braces, nail in temporary 2x studs to hold the wall plumb (see the drawing above). Place one end of the stud about б ft. up in a corner and nail it with two 16d nails. Once the wall is plumb, have a partner nail the stud at the bottom with two more 16d nails.
After plumbing all the walls and nailing in all the braces, it’s time to line, or straighten, the walls. Lining a wall is pretty simple. The bottom plate is
 |
straight because it has been nailed to a chalkline, and the top plates should be close to straight if you used straight stock when plating.
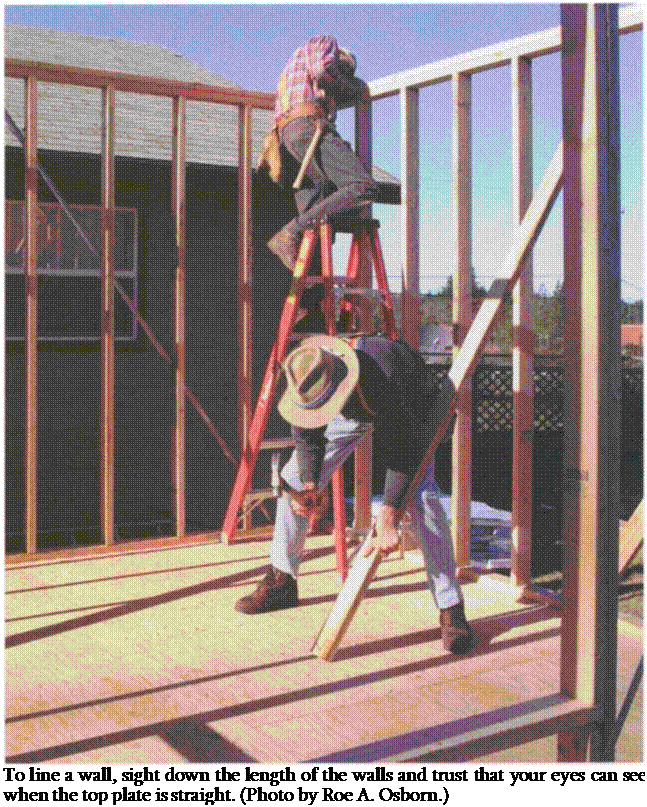
The easiest way to line a wall is to hop on a ladder in the corner and sight down the length of the walls (see the photo above). Trust your eye that you can see when the top plate is straight. Another method often used on long
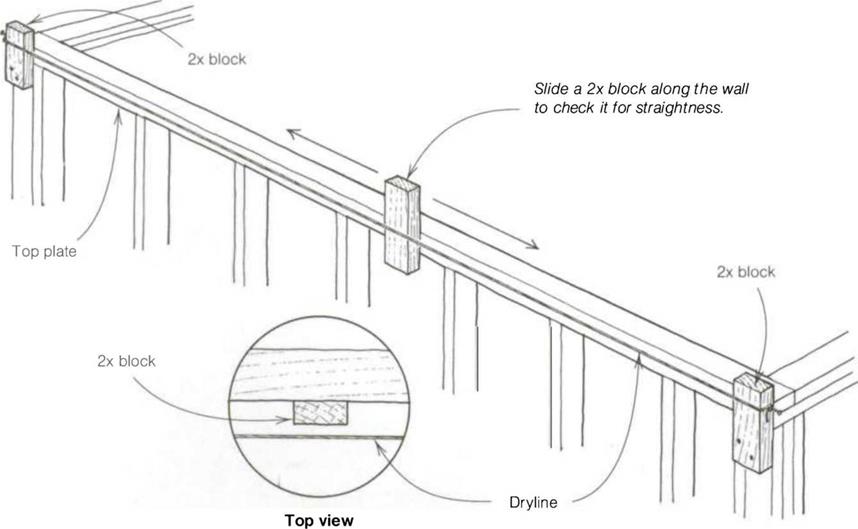
walls is to check the walls with a dryline (see the drawing on the facing page). Nail a scrap piece of 2x to the top plates at each corner and drive an 8d nail partway into the outer ends of each block. Hook a dryline to one of the nails, pull it taut, and tie it around the nail in the other corner. Then take another scrap piece of 2x and slide it along the wall, checking for a consistent 1 Умп. space between the line and the wall.
 |
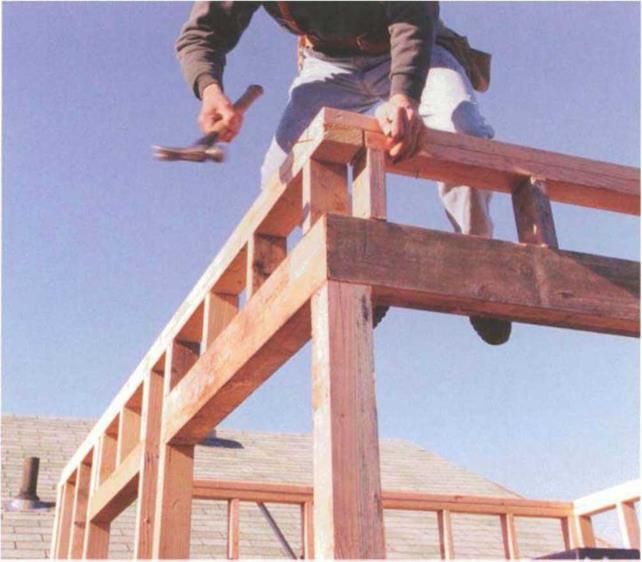
Any wall that isn’t straight needs to be moved in or out. For either job, you’ll need a partner. If a wall needs to be moved out, nail a 2x stud (with two 16d nails) flat against the edge of a wall stud about three-fourths of the way up on the wall (see the photo on the facing page). Hook the daws of your hammer under the stud and pry until your partner says the wall is straight. Then nail the bottom end of the stud to the floor with two 16d nails to brace the wall (see the drawing on p. 125).
If the wall needs to be moved in, nail a 2x stud on edge to the bottom of a wall stud. Let it extend to the outside, sitting on hard ground or on a short (1 – ft.) 2x block resting on the ground. Nail a 2x stud in place about three-fourths of the
way up on the wall with the bottom end positioned on the horizontal 2x (see the drawing on p. 128). Now you can move the wall in the same way that was used to move the other wall out.
Don’t hesitate to use plenty of temporary braces as you plumb and straighten walls. Extra braces at this point will guarantee that the building will be held plumb and straight until the rest of the framing is completed. I have worked on buildings where a temporary brace was knocked loose and the wall moved out of plumb because there were no other braces. This can cause a lot of anguish and extra work if it isn’t discovered right away. It’s not easy to straighten a wall once joists and rafters are nailed into it.


Leave a reply