Trimming rafter tails
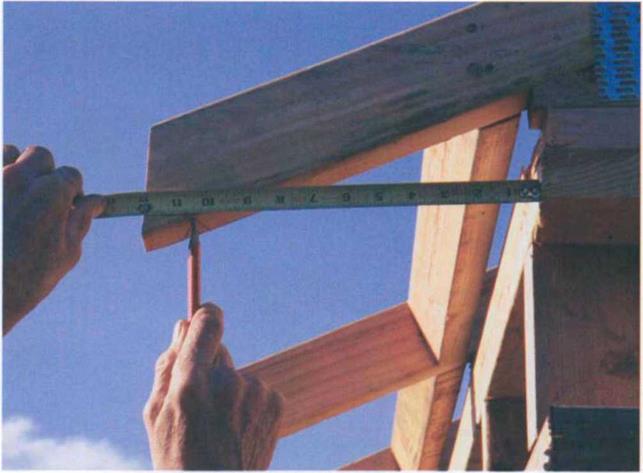
Before the fascia can be nailed in place, the rafter tails must be marked and cut to length. The overhang can be easily measured out from the wall. If, for example, the overhang is 12 in. and the fascia stock is a 2x (1 Vi in. thick), measure straight out from the building line
|
101/2 in. and mark this point on the bottom edge of the rafters at both ends of the building (see the photo on the facing page). Snap a chalkline across the rafters, including the barges, to connect the marks. Use the rafter-cutting template you made earlier to mark the plumb cut on the rafter tails (see the photo below).
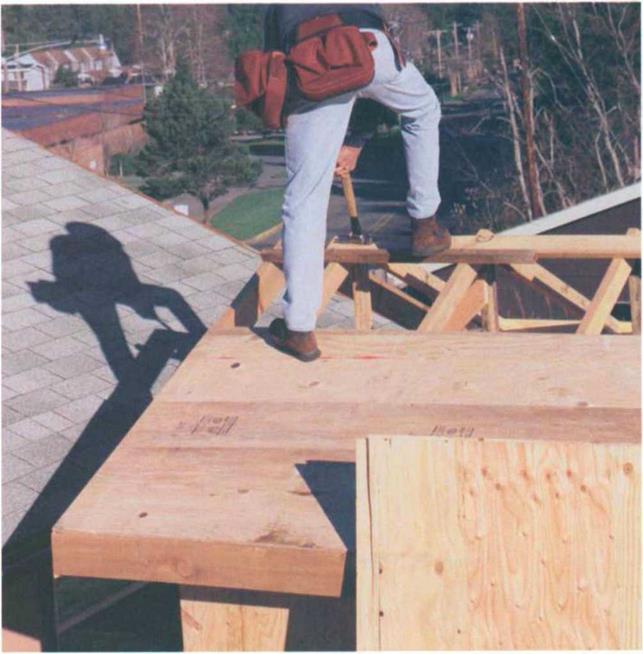
A professional carpenter can walk the plate and cut off the rafter tails. If this is too scary for you, then cut the tails from below while standing on a stable surface, such as a ladder or scaffold. Barge rafters are often mitered at a 45° angle along their plumb cut to receive the fascia. The mark on the barge rafters is the short point of this cut. This guarantees that the barge will be long enough to receive the fascia, which is nailed horizontally to the rafter tails.
Try to cut all trim material from the back side. Saw teeth tend to pick up wood grain and leave the upside of a board a bit shattered. This is finish work, so make every cut as clean as possible.
Also, try to use long, straight stock for the fascia, just as you did with the barge rafters. Start by making a square cut with a 45° miter to fit into the barge rafter. The other end of this first board is cut at 45° also, with the cut falling over a rafter tail so that the next piece can be securely nailed to it with an overlap.
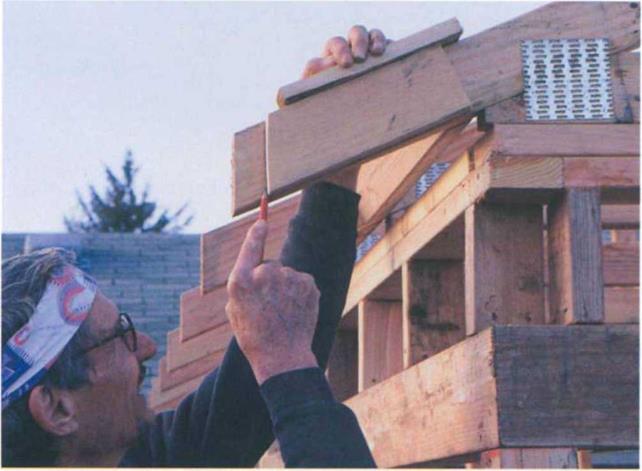
Now, working with a partner, nail the fascia into the barge rafter with 16d galvanized nails (see the left photo on p. 152). Because this is exposed, use a finish hammer, try not to miss the nail, and leave a nice, tight miter joint. Hold the fascia down a bit as you nail it to the rafter tails so that the roof sheathing can extend out over it and be nailed flush with the outside of the fascia. To find
|
|
|
|
|
exactly how high to place the fascia on the rafter, first place a scrap of wood on the rafter’s top edge and extending beyond the end of the tail. Place the fascia snug against this scrap and nail it to the first rafter, driving the first nail high and the second nail as low as possible (see the right photo above). Then continue nailing the fascia to the remaining rafters, being sure to join fascia boards together over rafter tails with a 45° lap joint.
Preparation for building a soffit
Building other types of simple soffits is covered in Chapter 8, but sometimes preparation for building soffits can be done as the fascia is installed. The first type of soffit needs a subfascia (see the top drawing on the facing page). Cut the rafter tails back an extra 1У2 in. Before nailing on the finish fascia, nail the subfascia to the rafter tails using the same stock as the rafters.
For the second type of soffit, cut a 3/4-in.-wide by V2-m.-deep groove into the back side of the fascia (before it is
installed) just below the rafter tails (see the bottom drawing at right). You can cut this groove with a table-saw – mounted dado blade or with a router.
Years ago, when wood shingles were the norm, we used to sheathe roofs with 1×6 boards. Often, a roof was strip – sheathed (sometimes called skip – sheathed), where the builders left 4-in. or 5-in. gaps between each board to allow the wood shingles to breathe. If you live in an older house, look in the attic and you can often see this type of sheathing. But today, because composition shingles are more common than wood shingles and need a solid base, most roofs are sheathed with plywood or oriented strand board (OSB).
Sheathing a roof is much like sheathing a floor. Begin by measuring up 48Уд in. from the fascia on each end and snap a control chalkline across the rafters. You can work off the straight fascia edge, but I find it easier to use a chalked control line that’s right in front of me.
On steep roofs, you can usually sheathe the first row or two while standing on the joists. If using OSB sheathing, take care to put the slick side down. I have stepped out on a frosty roof in the early morning and started skiing (for other safety tips, see the sidebar on p. 1 54). That’s the way it is with the slick side of OSB.


![]()
![]()


![]()


![]()


![]()
![]()

 The first sheet is always a bit difficult to get squared away on the roof and nailed directly on the control line, mainly because you don’t have a good place to stand. As with floor and wall sheathing, make sure the edge of each sheet falls in the middle of a rafter. The ends can extend out over the barge rafter and be cut later.
Safety roles for sheathing a roof
• Roofs with pitches over б-іп-12 are too steep to stand on.
• When necessary, use approved safety lines to hold you when sheathing a roof.
• Don’t wear slick-soled shoes.
• Be extra careful when working near the edge of the building.
• Sweep sawdust off sheathing panels because the dust will make the panels slippery.
• Stay off plywood that has ice on it, and be especially watchful early in the morning before the sun warms things up.
• When using sheathing that has one slick side, put the slick side down.
• Don’t carry sheets in a strong wind because they’ll act as a sail.
• On windy days, nail each sheet with enough nails to hold it securely until final nailing.
• Secure your tools so they won’t slide off the roof.
• Never throw scrap wood off the roof without checking to see that no one is below.
|

|
|
|
|
A common nailing schedule for a roof is 6-6-12 (6 in. o. c. at the edges and joints and 12 in. o. c. in the field). When you nail sheathing on the gable end and overhang, take special care not to miss the rafters. Missed nails can be seen from below, and they don’t draw the sheathing tight against the rafters.
Once you have the first row of sheathing down, start sheathing the second row. If you are using Win. plywood or OSB and the rafters are 24 in. o. c., you have to place metal clips on the edge of the panel between each rafter. The clips link the two sheets together so that any load between the two rafters is carried by the two sheets. Just like on a subfloor, remember to stagger the vertical joints. And remember to work safely, especially on steep roofs, nailing up 2x cleats as you go up and/or using safety lines as necessary to keep from sliding off.
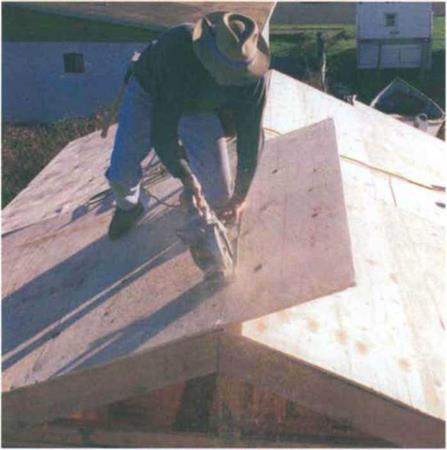
Once the last row of sheathing is in place, snap a chalkline along the ridge and cut, with your sawblade set about 3A in. deep (see the left photo above). Sheathing doesn’t have to fit perfectly at the ridge because it will be covered with roofing paper and shingles. In some regions, the sheathing is held back from the ridge from 1 Vi in. to 3 in. so that a ridge vent can be run the length of the building to ventilate the attic.
Once you have one side sheathed, move to the other side and work the same way. When the entire roof has been sheathed, trim the plywood flush along the gable ends (see the right photo above) and finish nailing. Not long after the roof has been sheathed, builders in wet areas like to cover it with felt roofing paper to protect the entire structure from the elements until the finished roof can be installed.


Leave a reply