STEP 7 SHEATHE THE ROOF
Sheathing a roof is much like sheathing a floor, except that the deck is sloped, not flat, and you work at least 10 ft. off the ground. Anyone who has worked in the construction trades for more than a few years has heard stories about someone who has fallen from a roof—or has seen it happen. I was sheathing a roof many years ago on a cool morning with a bit of frost on the ground. The sunny side of the roof had no frost. Without thinking, I stepped onto the shady side of the roof and was immediately careening down a fairly steep pitch, heading for doom. Fortunately, I had my straight-clawed hammer in my hand. Instinctively using it like an ice ax, I sunk the claw into the sheathing, stopping myself just short of the roof’s edge—a thrilling way to drive up my heart rate at the beginning of the day but not an experience I’d care to repeat. Take care, and stay aware.
MAKING A PLATFORM FOR ROOF SHEATHING
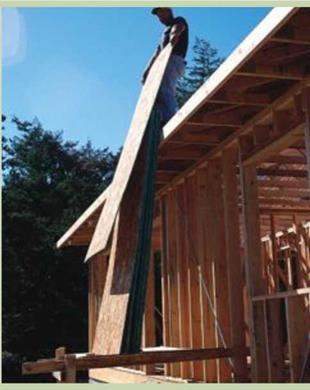
 A safe strategy for hoisting sheathing onto a roof is to build a simple staging platform, as shown in the photo at right. Nail the platform’s two horizontal supports (a pair of 2x4s works fine) to the wall framing or, if the wall has been sheathed already, to a 2x cleat nailed through the sheathing and into the studs. The supports must be a couple of feet above the bottom plate of the wall. Space them about 32 in. apart, and make them roughly level. Support the outboard end of the platform with 2x legs firmly attached to the horizontal supports. Nail a 2x on top of the platform near the outer end to provide additional stability. If necessary, install diagonal braces between the supports and the legs or the wall framing for added strength. Then set 4×8 sheets of plywood or OSB on edge on the platform; workers on the roof can grab the sheets as needed.

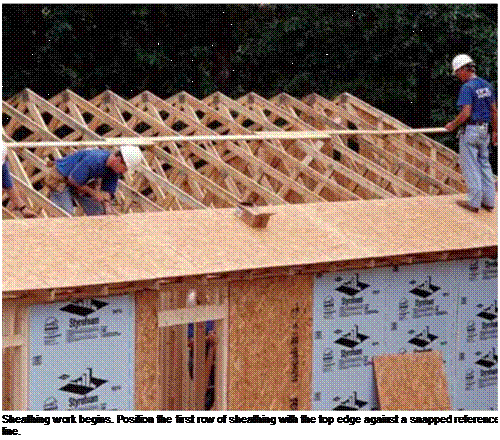
Measure 481/4 in. from the outside edge of the gutter or fascia board at each end of the roof and snap a chalkline. Lay the first row of plywood or OSB so that the top edge is right on this line (see the photo at left). Make sure the sheathing extends past the gable-end truss all the way to the barge rafter, which the sheathing helps support. Lay the slick side of the OSB down. Nail the sheets with 8d nails at 6 in. o. c. at the edges and 12 in. o. c. in the field. Be sure to nail all the boards.
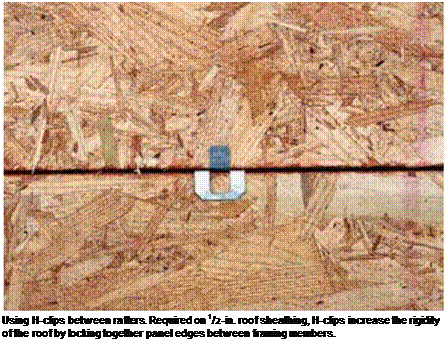
Before you start the second row of sheathing, put plywood H-clips, centered between the rafter chords, on the first row (see the top photo on the facing page). Required on /’2-in. sheathing (but not on 5/8-in. sheathing), these clips hold two sheets together and make the roof’s surface stronger. Start the second row at one end with a 4-ft.-sq. sheet so that the courses will be staggered, just as they are with floor sheathing. Continue sheathing until you reach the top. If a ridge vent will be installed, leave a gap at the ridge so that air inside the attic can move up into the vent. If the vent is available, read the

![STEP 7 SHEATHE THE ROOF Подпись: An air-operated nailgun can be used to fasten tarpaper securely to the roof before shingles are laid in place. [Photo by Don Charles Blom]](/img/1312/image433_0.gif)
 |
manufacturer’s instructions regarding the size of the gap and check with your building inspector regarding these construction details. The gap need not run all the way to the barge rafter. Start it about 1 ft. in on the main roof.


Leave a reply