Seal twice around vents
The vent pipes that extend through the roof are flashed with special rubber or metal boots when the shingles are installed. But here in rainy Oregon, roofers take the time to make a double seal around these pipes. This is sort of like wearing a slicker and carrying an umbrella, too—but there’s no such thing as being too careful when it comes to roofs and water.
To provide this extra protection, cut a 3-ft.-sq. piece of felt and cut a hole in the center the size of the vent pipe. Slip the felt over the vent and seal around the pipe with a tube of roofing tar. Do the same when you roll out the long strips of roofing felt. Cut the second layer of felt around each vent and again seal it around the pipe with roofing tar. You can lap the felt over the ridge, but remember to cut it away when you shingle to permit airflow into the ridge vent.
Protect valleys and intersections
When a porch roof intersects the main roof at a right angle, valleys are created on each side of
the intersection. Valleys divert more water than a regular gable roof does, so I always provide extra protection in the form of flashing. I like to roll at least two layers of 30-lb. felt right down the center of the valley. Even better is to cover the valley area with a sheet of 90-lb. rolled roofing. Then, when you install regular roofing felt, lay each row 12 in. or more beyond the valley and keep all roofing tacks at least 12 in. from the center of the valley. This technique provides a double layer of protection prior to shingling.
When working on a roof that butts into the sidewall of a house (a porch roof connected to a gable end, for example), lap the felt on the sidewall by at least 6 in. to prevent leaks at the intersection.
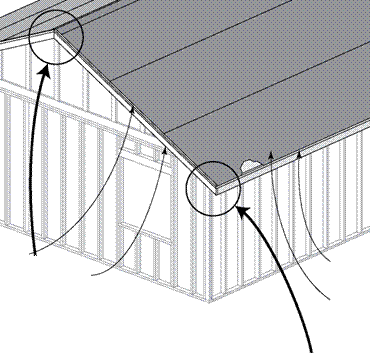
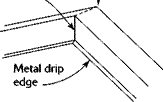
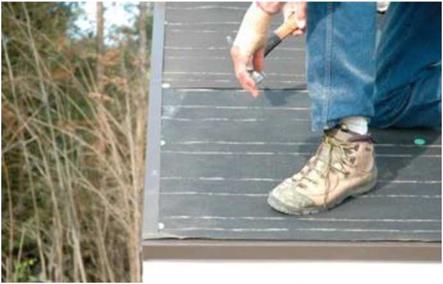
Once the felt is in place, make it more secure around the edges by installing sections of vinyl or metal drip edge. Drip edge is an L-shaped metal or vinyl flashing that comes in 10-ft. sections. One leg of the L profile extends about ІУ2 in. up the roof; the other leg extends down the fascia or barge rafter by the same distance (see the photo at right). It has a slight lip on the lower edge to divert water from the roof.
Using roofing nails, install the drip edge under the felt at the eaves and on top of the felt at the rakes, or gable ends. Space nails about 2 ft. apart. Where one length of edging joins another, overlap the joint by about 4 in. Along the gable ends, make sure the top length of the drip edge laps over the one below. At the corners, cut a pie-shaped slice out of the top section. This allows you to bend the drip edge at a 90-degree angle and nail it around the corner. At the ridge, make a plumb cut in the vertical leg and bend the edge over the ridge, allowing the plumb cut to overlap, as shown in the illustration above.


![]()

![]()


![]()
 Installing a drip edge. This L-profile flashing is installed to protect the edges of the roof. The bottom flashing goes beneath the paper and the side flashings go on top. [Photo by Don Charles Blom]


Leave a reply