Nail the casing to the jambs
Nailing trim around doors and windows can be difficult when the wall extends past the jamb.
If drywall edges protrude just a little, they can usually be knocked back enough by hitting them gently with a hammer. Just make sure the casing will completely cover the flattened, compressed drywall.
Sometimes, I start by installing door casing inside a closet, where people won’t readily notice mistakes. Think of it as a warm-up exercise. Begin by nailing a piece of side casing first, holding it to the reveal marks. (Other people start with the head casing first.) If you’re nailing
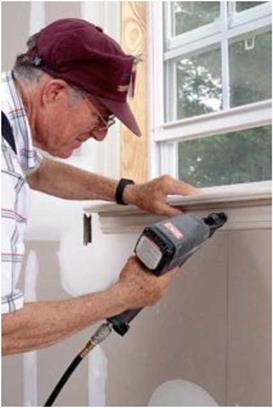
the casing by hand, drive a pair of nails at the top and then about every 16 in. down the casing. Drive 4d nails through the trim and into the jamb, and drive 6d nails through the thicker part of the trim and into the wall frame. A pneumatic finish nailer makes this job much easier, and you won’t have to use different size nails.
Next comes the head casing. Check the joint between the head and the side casing. If it looks good, add a bit of glue to the ends of the two pieces, then nail the head casing to the wall along the horizontal reveal line (see the photo above). If the joint is open a little, cut the miter again and fine-tune the angle of the chopsaw, if necessary, to get a better fit. If the joint is open more than a little, cut another headpiece; start a little long and make sure you have the angle right before cutting it to length. If all else fails, fill the joint with putty before painting. Repeat this process for the second piece of side casing.


![]()

 |


folks with special needs. A local woodworker in his small shop builds the cabinets we use in Habitat houses here on the Oregon coast. They are made from pine or birch and particleboard. Although simple in style, they’re also beautiful and, thankfully, rather inexpensive.
Kitchen and bath cabinets can be installed any time after painting. Base cabinets should be installed after the underlayment and the vinyl
floor are in place. That makes it much easier for the vinyl-floor installer. Just be careful not to mar the floor while installing the cabinets. Baseboard trim is installed after the cabinets because it butts into the base cabinets.
Today’s kitchens are filled with many appliances, such as a refrigerator, stove, microwave oven, garbage compactor, and dishwasher. Most appliance suppliers are more than happy to look at your house plans and help you design a kitchen in which every cabinet and appliance fits into its allotted space. Once you settle on a cabinet style, you can choose different sections—one for dishes, one for pans, one for utensils, and so on. After cabinets are delivered to the job site, they are installed one section at a time.


Leave a reply