Fill holes and gaps
Once the trim has been installed, the next step is to set all the nails, then fill and sand the nail holes. Any nails that are above the surface of the wood must be driven below the surface with a nail set (see the photo at left). If you plan to stain or polyurethane the trim, fill the holes with matching wood putty. For paint prep, you can use painter’s putty or ordinary Spackle® applied with a small putty knife or your finger.

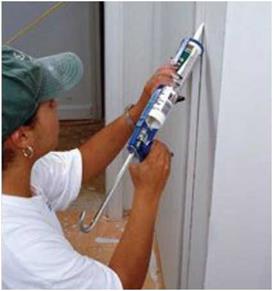
 Sometimes the miter joints (where the door and window trim meet) are not tight so you need to fill the gaps. There also may be slight gaps between the wall and sections of door and window casing or baseboard trim. In addition, check for gaps between shelving and walls and around cabinets and other built-ins. All these gaps can be filled with latex caulk, which is paintable and has enough elasticity to move as wood trim expands and contracts with changes in temperature (see the photo below). Wipe off any excess caulk with a damp cloth.
|
|
 Before painting any trim that has been nailed in place, take the time to remove all the doors and cover the cabinets with paper and painter’s masking tape. I like to use what is called painter’s tape, because it pulls off easily and doesn’t leave a glue residue. Cover finished floors with a paint-absorbing drop cloth. Unscrew the hinges from the door jambs and store them in a box or plastic bag. Some people paint the trim with the same paint they use on the walls. In that case, there are no cutting – in problems between the wall and the trim. However, you may want to use semigloss paint on the trim and doors or semigloss on the trim
and gloss on the doors. Surfaces that are finished with semigloss and gloss are more stain – resistant and easier to wipe clean than flat-finish surfaces. In addition, higher-gloss paint sets off the trim nicely.
Whichever kind of paint you choose, learn to trust yourself with a brush rather than masking between trim and wall surfaces. Masking a wall when painting the trim can be a disaster. When you remove the tape, you could also very easily remove new paint.
Instead of masking off, try using the drybrush method when cutting in. Dip about one-third of the bristles in the paint, then wipe one side of the brush on the lip of the paint container. Place the dry side of the brush toward the surface that will not be painted and draw a straight “cut” line. Even if you get a little trim paint on the wall, all you have to do is touch up the wall. If a little bit of wall paint gets on the trim at that point, just repaint the trim.


Leave a reply