AND FINISH THE DRYWALL
![]()
![]()

![]()
straight, finished edge. Both metal and vinyl corner beads are designed to be nailed or stapled in place. Use tinsnips to cut floor-to-ceiling beads. Cut them at least V2 in. short, but hold them tightly against the ceiling. Starting at the top and working down, fasten the bead to the corner stud (below the top plates) with pairs of nails or screws opposite each other every 8 in. to 10 in. A pneumatic stapler also works well. Make sure all the beads are straight and lie flat against the wall.
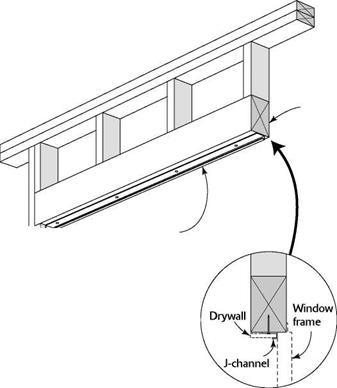
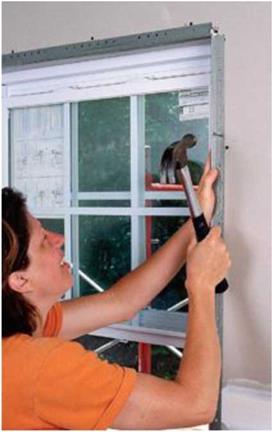
Beads around windows and doors are attached just like those on corners. The header beads are cut square on both ends and then nailed in place. The side trimmer pieces are also cut square and butt into the top piece (see the photo at right).
I am not a professional drywall finisher, but I have taped enough wall and corner joints to know that this job is both an art and a skill. Some finishers can leave walls and ceilings as straight and smooth as glass. To the trained eye, my work looks more like antique, handmade glass—generally flat, but with some rippling and variations that give it character. The thing to remember, regardless of your skill level, is that taping drywall is finish work, so it needs to look good. Although your first efforts aren’t likely to be masterful, with patience and knowhow you can learn to achieve good, solid work. This section will give you the basic know-how. The patience you’ll have to provide yourself.
|
Install corner bead. This metal trim is nailed over drywall-covered outside corners. The flanges and nails will be covered by several coats of compound. Drive nails in both flanges every 8 in. to 10 in. |

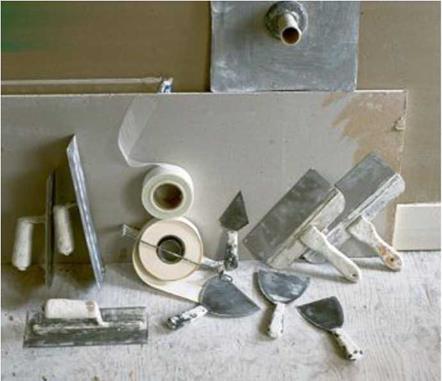
Although professional drywall finishers rely on an assortment of equipment, including stilts to speed ceiling work, you can achieve very good results with just a few tools. You’ll find them at well-stocked hardware stores, home centers, and drywall-supply outlets.
TAPING KNIVES. Mud applicators are called knives, even though they look more like overgrown spatulas. A 5-in.-wide knife is good for applying joint compound (referred to as mud). Wider knives are used to smooth and feather the edges of mud, tapering it so thin that it will be as undetectable as possible once the paint is applied. If you’re new to drywall work, start with 5-in., 8-in., and 12-in. knives for best results.
TROWELS AND HAWKS. These tools are simply flat pieces of metal with handles attached. Their main purpose is to hold a small batch of compound at the ready so that you can scoop it onto the wall with a taping knife. Trowels are rectangular, while hawks tend to be square. Which tool works best is a matter of personal preference. In the hands of an experienced worker, a trowel can be used to both hold and apply compound.
POLE SANDER. Sanding finish coats of compound is often necessary to smooth uneven areas. A pole sander consists of a sanding block attached to a pole. To sand the first two coats, cover the block with 120-grit sanding screens. When one side is dull, turn over the screen and use the other side. For the final sanding, switch to a 150-grit screen.
PORTABLE LIGHTS. With one or more bright, halogen-type work lights, you’ll have a much easier time finding flaws in the top coat. DUST MASK AND GOGGLES. Don’t begin to sand drywall compound without donning safety gear.
Use tape and knives for their respective tasks.
Tape—either paper or plastic—is used to cover the joints. Different-size knives are used to apply and level drywall compound. [Photo by Charles Miller, courtesy Fine Homebuilding magazine © The Taunton Press, Inc.]
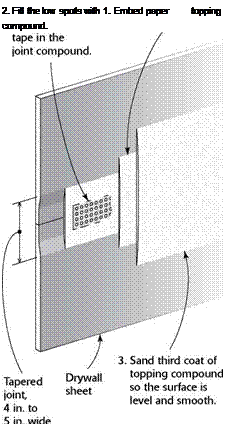
Tape and drywall compound hide the joints and make them strong.


Leave a reply